How to Use VoiceOver for Accessibility Testing

This blog post is intended for sighted developers wanting to use the VoiceOver screen-reader to test web pages for accessibility. VoiceOver comes free with MacOS and is pre-installed. Some assumptions have been made that you are able to visually see and interact with your computer’s screen.
Screen-readers are a popular tool for visually impaired users. They enable people with no or reduced vision to work with computers and browse the web.
As web developers, it’s important that we take users of screen-readers into consideration when building websites. Doing so helps ensure that the websites we build are accessible to a larger audience. As with most accessibility considerations, improving our sites for those with specific needs generally has a positive impact on the wider user experience of all users.
To make websites accessible to screen-reader users we need to develop them with good semantic markup, appropriate use of aria attributes, alt text for images, etc. However, to ensure we’re getting these right, we need to be able to test our pages. Having some familiarity with a screen-reader will make a big difference here. It is easy to fall into the trap of making assumptions of what will work, without actually testing.
Getting Started
If you’ve never used a screen-reader before, you’ll quickly discover that it can be a very noisy experience. It can feel like you are being bombarded with information. I’d recommend that you reduce any background noise. You’re unlikely to appreciate your Spotify playlist playing in the background. Also make sure your Mac is not muted and that the volume is at a comfortable level.
To get the most out of this guide, I’d recommend opening up a webpage that has been designed with accessibility in mind and built to good standards, and trying VoiceOver yourself. The BBC and RNIB websites are good examples. You can then try out one of your own sites once you are more familiar with the screen-reader.
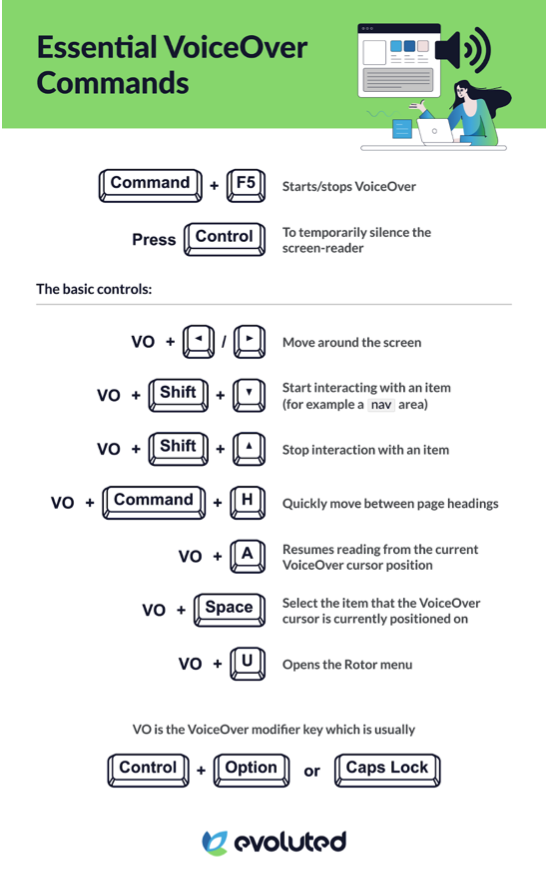
To get started with VoiceOver you want to press Command + F5. The next important thing to know is pressing Command + F5 again will turn off VoiceOver. If you’re using a keyboard with a Touch Bar the function keys are not always showing, in which case you want to use Command + fn + F5. Note that turning off VoiceOver from the Touch Bar requires you to press Command + fn + F5 then double tap the Touch Bar to confirm the selection; this is to account for the fact that visually impaired users need audio clues as to what they are touching before confirming their selection.
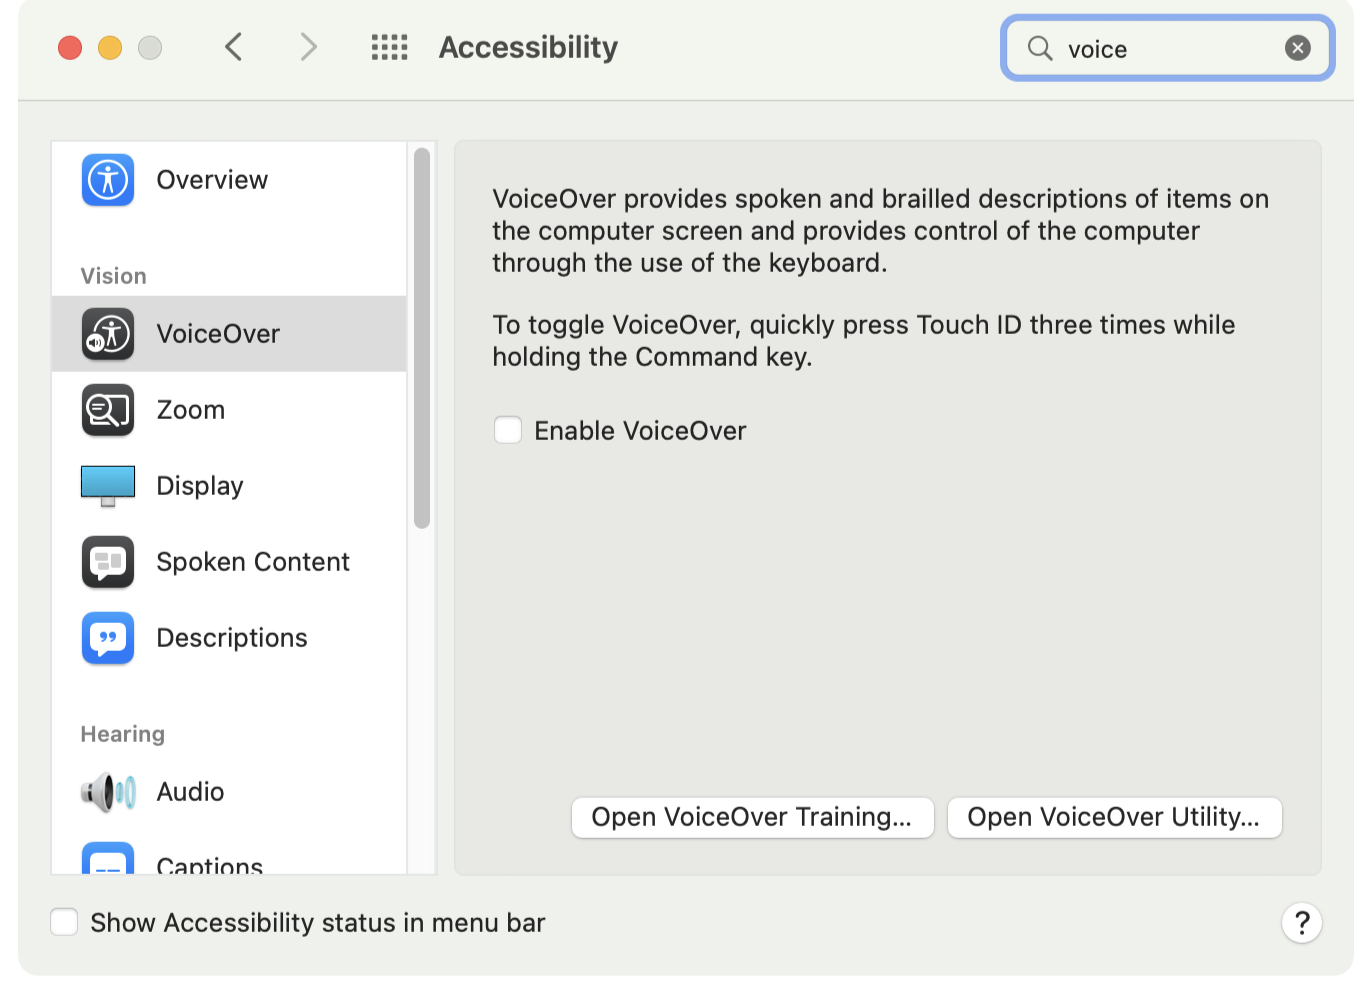
You can also toggle VoiceOver on and off through the Accessibility settings of your System Preferences.
When VoiceOver is active, you should notice a high-contrast info dialog is displayed on screen. This shows subtitles for what is currently being spoken and will also be used when interacting with some of VoiceOver’s tools. It’s important to remember that about 1 in 5 screen-reader users are partially sighted, so have some vision. This dialog is there to help those users and others who can see the screen.
To stop VoiceOver from talking (trust me, you will) you can press the Control key at any time. This will silence the screen-reader until you next interact with it (which we will cover next).
The VoiceOver Modifier Key
VoiceOver comes with a large selection of control keys that enable you to navigate your computer. As a developer, you only really need to know a small number of these.
The first thing you need to familiarise yourself with is the VoiceOver modifier key. This is the key/keys that when pressed in combination with another key on your keyboard will perform an action.
The VoiceOver modifier key is usually either one of the following:
Control + Option
Caps Lock
You can check what has been set up on your Mac by going to System Preferences, Accessibility, VoiceOver then opening the VoiceOver Utility. From there you can see what has been set up as your VoiceOver modifier under the ‘General’ tab and change the setting to whatever suits you best.
For the remainder of this blog post, I will refer to the VoiceOver modifier key as just ‘VO’.
The Basic Controls
If your main motivation is to test web pages for accessibility, then the following commands should be sufficient for the majority of tasks:
VO + right/left - This will move you around the screen.
VO + Shift + down - This will let you start interacting with an item (for example a `nav` area).
VO + Shift + up - This will stop interaction with an item.
VO + Command + H - This will quickly move you between headings on the page.
VO + A - This will resume the reading from the current VoiceOver cursor position (useful if you’ve paused speech with Control).
VO + Space - This will let you select the item that the VoiceOver cursor is currently positioned on. Essentially, this is a simulated mouse click.
With VoiceOver enabled, when you open a browser window it will usually put the focus on the web page and start interacting with the page’s content. If you find yourself stuck within the browser’s UI, for example the tabs, you can use VO + Shift + down/up and VO + right/left to move the focus to the browser content. This can be a little fiddly if you are unfamiliar with using a screen-reader.
Sometimes, VoiceOver’s focus will move off screen. If you want to see where it is positioned (there’s normally a bold outline around the current item), then use VO + right to try and bring the focused item on screen.
Use VO + k for more help and information about what keys do in VoiceOver. Use Esc to exit the keyboard help.
Rotor
Holding down VO + U will open up VoiceOver’s Rotor menu. This is a really useful tool for getting overviews of a page to aid navigation.
Rotor will give you overviews of all links on a page, headings, form controls and landmarks. You can switch between the overviews using the left and right arrow keys.
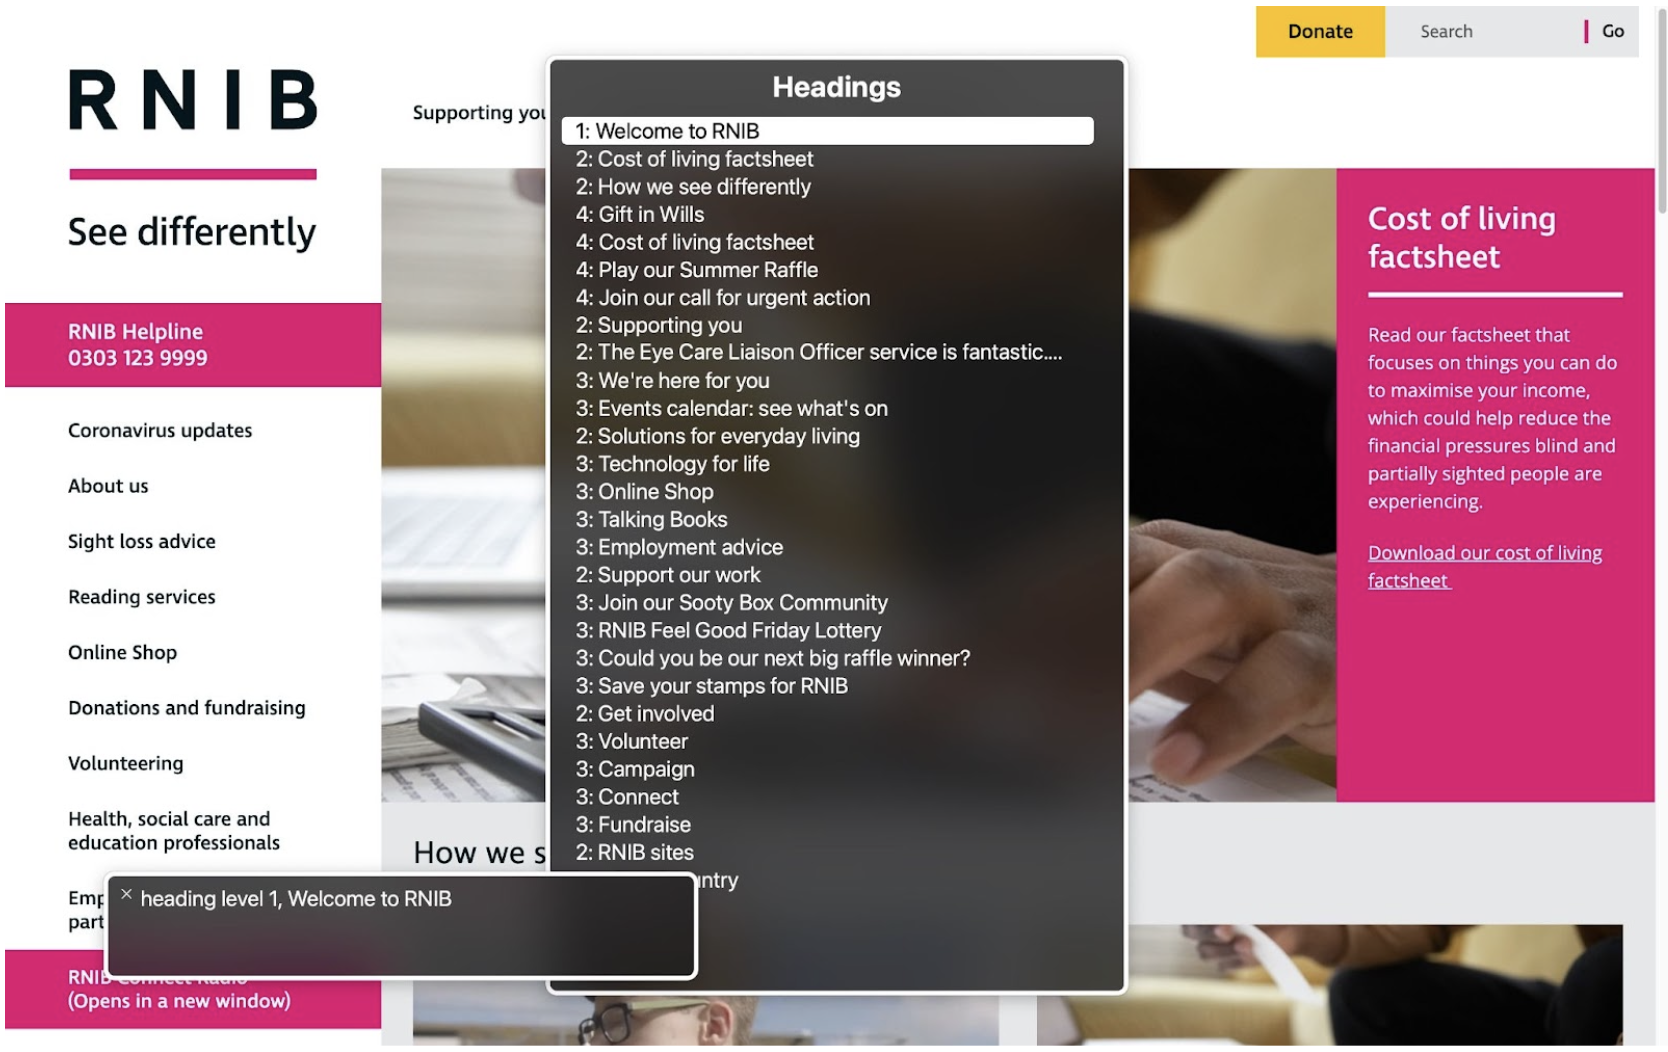
To move between the items in the current overview you can use the up and down arrow keys and press enter to focus VoiceOver’s cursor on that part of the page. You can filter the results of the current overview by typing on the keyboard. For example, when viewing the Links you can start to type ‘contact’ to attempt to reduce the items and locate a link to a contact page.
I’d recommend opening up Rotor when testing a site. It’s a good way of checking that your content makes sense. For example, when taken out of context are your links understandable? Are your page landmarks unique or have you caused confusion by duplicating roles?
To exit the Rotor menu use the Escape key.
Changing the Voice
If you find that the screen-reader is talking too fast you can change the rate, as well as the pitch, voice and volume using the speech settings.
To open the speech settings use VO + Shift + Command + up/down. You can then use left/right arrow keys to move between the settings. If, like me, you find this a bit like a game of Twister, you can also change these settings from the VoiceOver Utility and select the ‘Speech’ tab.
Notes for Developers
In a 2021 user survey by WebAIM it was found that the most popular screen-readers in use were JAWS, NVDA and VoiceOver. VoiceOver comes in third place for primary screen-reader usage. The reason we’ve picked this particular application for our guide is that it is free to use for Mac users (which is the OS used by our developers). Whilst JAWS is the most widely used screen-reader, it is expensive to buy. NVDA, the second most used reader, is free, but only available on Windows.
WebAIM’s survey also noted that:
"Respondents with disabilities are more likely to use JAWS and NDVA and less likely to use VoiceOver as their primary screen-reader than respondents without disabilities."
This is important to bear in mind when testing with VoiceOver. There may be differences between how VoiceOver works compared with JAWS or any other screen-reader. However, it is still better to test our work with VoiceOver than not testing in a screen-reader at all. Most issues you identify with your website will exist for all screen-readers, for example confusing use of semantics.
According to the Screen Reader User Survey, Chrome is the preferred browser. However, for VoiceOver users, Safari is more popular.
I’ve mentioned using VO + Command + H (or the Rotor menu) for navigating by heading. This is a really important feature. According to WebAIM’s survey, two-thirds of respondents navigate by heading as their first step in finding information on a page. So checking your headings is hugely important.
As you test sites, it’s important to remember that most screen-reader users will be familiar with some of the things that may sound strange when read out. For example, words are often mispronounced. As tempting as it is to correct these with an `aria-label`, it’s important not to do this as it will cause issues for those using Braille-readers or those reading the on-screen subtitles generated by the screen-reader.
Final Words
Hopefully, this blog post has been useful and you are now in a position to start testing your sites with VoiceOver. I strongly recommend having a play and familiarising yourself with it (or any other well used screen-reader). You can also use VoiceOver’s inbuilt training by opening up the Accessibility settings (under System Preferences) and finding VoiceOver (under Vision).
As previously mentioned, I’d suggest you start with a website that is known to have been built with accessibility in mind. This will help you get going without being caught out by accessibility issues on the page being viewed. Once you feel comfortable using VoiceOver, you can then try it out on one of your own sites and start to identify where you need to make improvements.
Free Website UX Guide
We recently published a comprehensive free guide to website UX, with improving website accessibility as a key focus. At Evoluted we want to lead the way in creating a more inclusive and functional web for all, so we designed the guide to be actionable for all readers, whether you're a developer, marketer, designer or business owner.
Read our full Website UX Guide today.
If you require expert support with your next web development project, check out our development and UX services today.

With more than two decades’ coding experience under his belt, Senior Developer Andy continues to prove an integral part of the Evoluted development team. Having been with Evoluted since 2012, he has worked on countless projects for our clients. An analytical thinker, his background includes time spent working as a theoretical physicist; which involved research into Quantum Optics.